Programming your tags is easy using the Trigger App! For example, you can place a tag next to your front door that you have programmed to switch between WiFi and Data. When you get home, you can tap your phone to the tag and it will automatically turn on WiFi and turn off Data. Then, when you go out, you can tap the tag again and it will turn off WiFi and turn on Data. Follow the directions below to program your tag using the Trigger App!
Example: How to Turn On/Off WiFi and Data using your NFC Tag

Step 1
Download the Trigger App from the Google Play store and launch the App
Step 2
Add a new task by selecting the “+” in the top right corner
Step 3
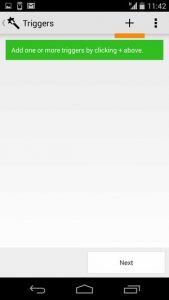
Add a Trigger for the task by selecting the “+” in the top right corner
Step 4
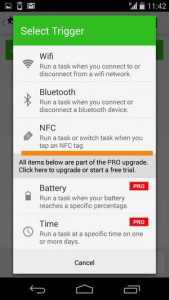
Select NFC to specify that you want to use your NFC tag to trigger your task

Step 5
Select Next to confirm you want to use your NFC tag as the trigger for the task
Step 6
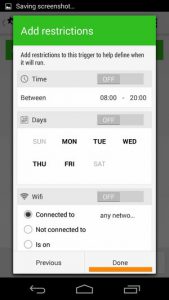
Add any restrictions. This is optional, so if you do not have any, choose Done.
Step 7: Click Next to confirm the Trigger and move on to create your task
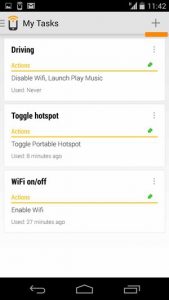
Step 8: Create a name for your new task, and then select the “+” in the top right corner to create the task
Step 9: Under Wireless & Networks, select Wifi On/Off and Mobile Data On/Off, and then click Next
Step 10: Configure actions to Toggle Wifi On/Off and Toggle Mobile Data On/Off, then click Add to Task
Step 11: Confirm your new task by clicking Next
Step 12: If you do not wish to add another task, click Done
Step 13: Place your device over a Tagstand sticker or tag to program the tag (it works best if you remove your case)
Step 14: Your device will sound an alert when it has finished programming and you will see a message that the tag was written successfully! You’re done!